I am so excited to be back with another Lemon Sugar remodel project, and especially excited to be working with my friends at Organized Living again! If you remember, we teamed up several months ago to tackle my pantry remodel, and it turned out SO good that we’ve decided to take on a bigger and more challenging space – a playroom for my girls!
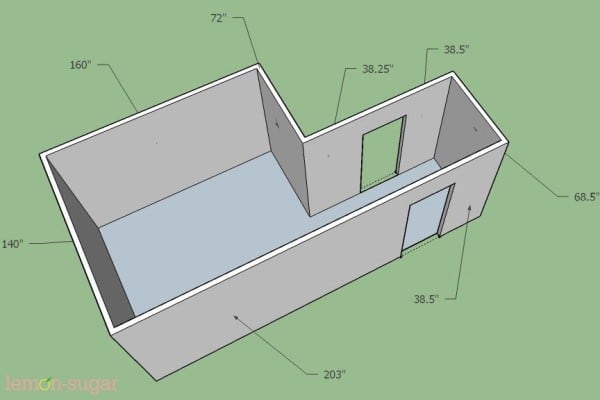
This project is a little bit bigger and more involved because we didn’t have an existing space to work with. Instead, we converted a storage room in our basement that we weren’t really using, and turned the 210 square feet of wasted space into a super-adorable space for the girls to call their own.
If you follow along here at Lemon Sugar, you know that my girls are nine and five years old. Over the years, their bedrooms have been steadily filling up with toys, books, dolls, art supplies and games. We were constantly fighting the messy-room battle, and finally came to the conclusion that their rooms were just not equipped to store toys. Their “stuff” needed a space. Their bedrooms weren’t providing a peaceful, distraction-free place to sleep, and it was becoming a real problem.
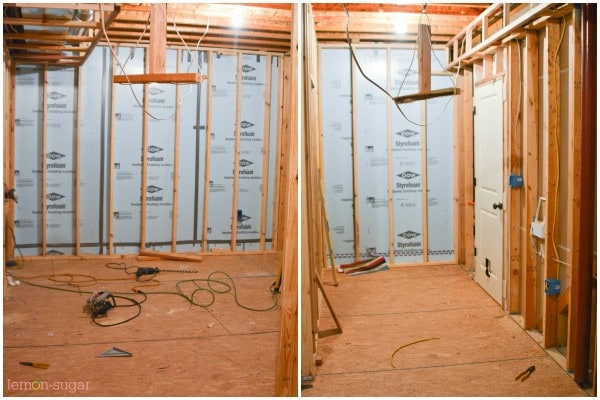
I don’t have a true before picture, because it was really just an empty basement room, but the next few shots give you and idea of the very beginning of the project. We started by framing the walls of the space, insulating the floors and the walls, and running wire to the room for the additional lights and outlets we’d need.
I am fortunate to be married to a very handy guy – he did all of the work himself over a couple of months time. I have to admit that the beginning of any remodeling project is super-boring to me – I can’t get excited until we get drywall up because it’s not until then that I can truly envision what the space will look like.
One of my very favorite things about our new space is the wood floor.
We made it. From plywood.
Yup.
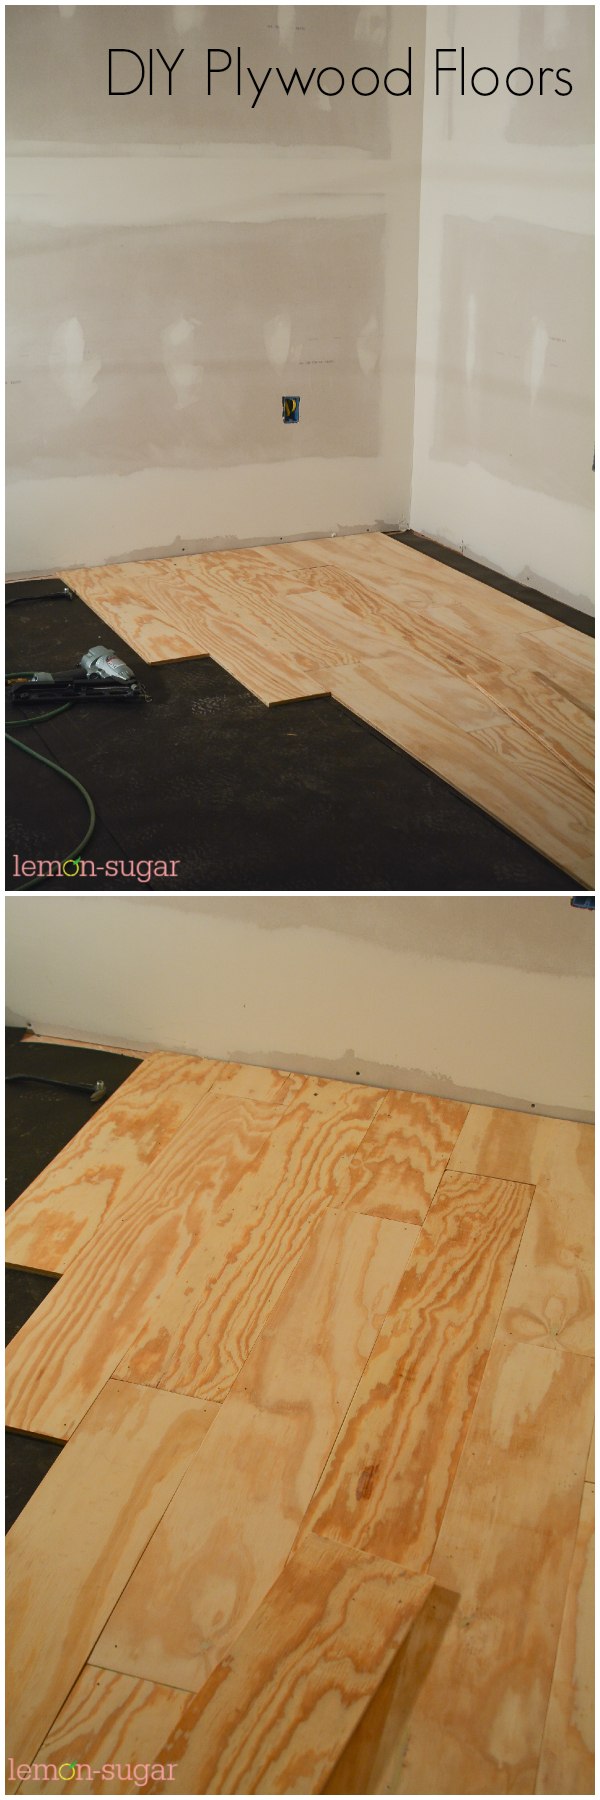 We bought sheets of plywood (it took seven sheets) and cut them into 7.5″ planks of varying lengths – we bought (B/C) grade plywood, at a cost of about $24 per sheet. We lightly sanded the top of each plank, and then used an orbital sander to slightly bevel each edge so we’d have a smooth seam between the boards.
Because we were going for a casual, rustic appearance, the boards were just nailed in from the top – using 15-gauge finishing nails (1-3/4) and the pneumatic nailer. Another quick sanding session ensured that we didn’t have any tall, sharp or splintered edges, and we were ready to stain.
This is where I came in. We watered down a white, water-based primer at a ratio of one-part water to two-parts primer. I used a roller to lightly cover the plywood planks with a single coat of the primer mixture. This gave us a cohesive surface for the stain to adhere to – plywood grain is very prominent, and we didn’t want a strong grain pattern to show through, so the primer really helped the stain absorb more evenly.
After the primer dried, we did another spot check with sand paper, and quickly sanded down any rough spots. Then, things got messy.
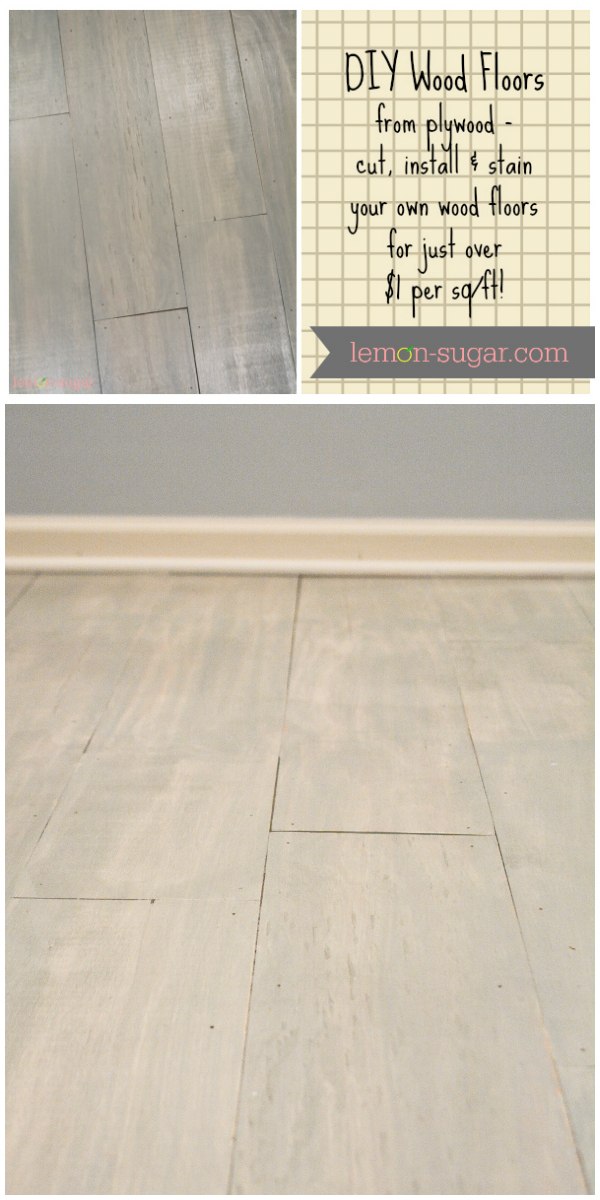 I found a lovely gray driftwood stain that I fell in love with – and it turned out just the way I imagined! It took about an hour to stain the floors, which I did entirely by hand because I wanted a very light coat of stain. I brushed on a 1-foot by 2-foot area of stain, and immediately wiped it off with some clean rags, and I repeated it until the entire room was done.
I was sore the next morning. <– Understatement of the century.
When the stain dried, my husband sanded the entire room which allowed some of the white primer to show through, smoothed the floor, and gave it a nice, finished look.
We followed the stain with two layers of satin polyurethane, and I have to tell you, I’m in love. And even better? The total cost of the floor, including wood, nails, primer, brushes, stain, poly, sandpaper and rags? $225. That’s $1.07 per square foot. Finished and installed. And I would do it again in a heartbeat because it turned out SO good.
So, that takes us through the construction and tomorrow we’ll get to the good part – I’ll show you the installation of our awesome Freedom Rail system by Organized Living. Then, this weekend I’ll post the final reveal and show you some of the goodies we used to furnish the room and make the girls feel right at home.
Stay tuned!

[…] First things first, if you haven’t read Part 1, go back and read it now. […]